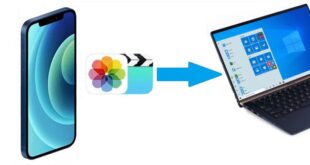
Easiest Ways to Transfer Photos from iPhone to Computer
Many users complain of compatibility and low transfer-speed challenges when sharing photos between an iPhone and a computer. Fortunately, you don't have to worry about that anymore.
We have shortlisted the best methods to help you copy photos from iPhone to PC effortlessly. Keep reading and learn how to send photos from iPhone to computer, no matter whether you are a tech-savvy person or a beginner.
A Brief Comparison and Review of Each Method
Based on user feedback, we have summarized the key points of each method in the below table.
Tool/Method | Transfer Limit | Ease of Use | Speed |
AirDroid Personal | Unlimited under the local network | Very easy | Very fast |
iCloud Website | A free account can sync data up to 5GB. | Easy | Slow |
iCloud for Windows | 5 GB data limit | Easy | Slow |
iTunes | Unlimited | Lengthy and cumbersome | Very slow |
Google Photos | 5 GB | Easy | Slow |
It clearly shows that AirDroid Personal is the first priority for everyone when it comes to transferring loads of iPhone photos quickly.
The Easiest Way to Send Photos from iPhone to Computer Wirelessly
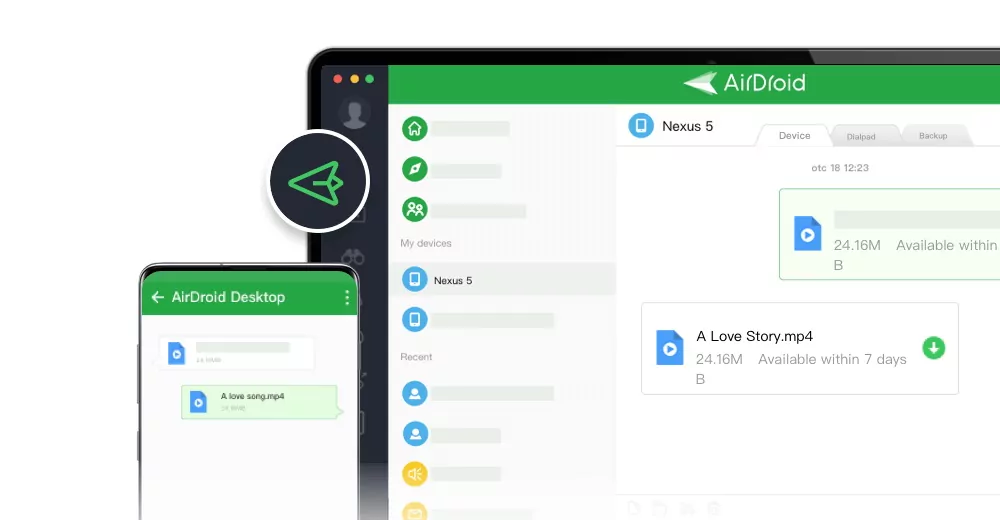
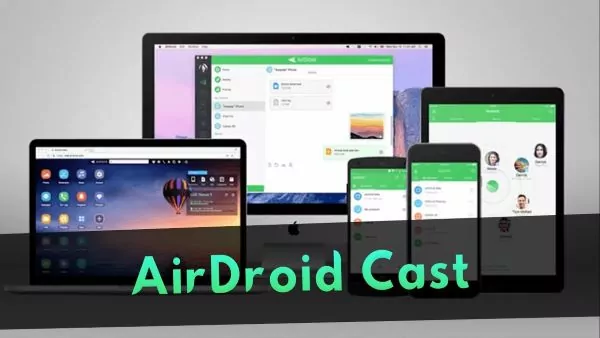
When it comes to the best tool to transfer photos from iPhone to PC without iTunes, AirDroid Personal stands out. It is primarily a mobile management program that comes with advanced file transfer capabilities.
With its 20MB/sec transfer speed, it can move GBs of your iPhone photos to a computer within minutes. The program excels its competitors in versatility and user-friendliness. It takes just a few clicks to connect your devices remotely and start sharing the data.
Aside from photos, it is compatible with all types of data including videos, contacts, music, documents, and more. One of the most spectacular features of AirDroid is its easy integration with all the devices and platforms. It supports wireless data transfer between iPhone, Windows, iPad, Mac, Android, and Samsung.
Key features of AirDroid Personal
- Ability to transfer unlimited iPhone photos to a computer without a wired connection.
- Offers a one-click integration with all platforms and devices.
- It can send data to multiple devices in one.
- With its Friend feature, users can share photos and other files to a remote device.
- Chat in real-time with remote devices when sending data to them.
- Offers mobile management features like remote camera, SMS and notification management, file management, and screen mirroring.
AirDroid is among the very few programs that offer multiple ways to transfer data between your devices. Let us cover each method in detail.
Method 1: Using the File Transfer Option
The most efficient way to load photos from iPhone to computer is using the AirDroid Personal apps on both devices. Check out the below instructions:
Step 1: Install AirDroid Personal on your iPhone and computer. Sign up with an AirDroid account on both devices.
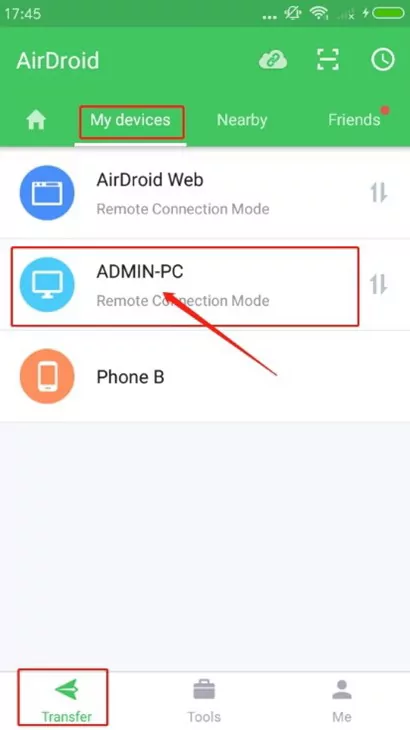
Step 2: Run the mobile app and tap "My Devices." Find and select your computer's name.
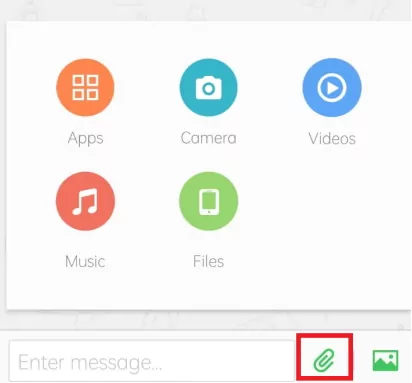
Step 3: The program will establish a remote connection between your devices. Now, tap the paperclip icon and select the photos you want to transfer.
Step 4: Once the photos are uploaded on the app, tick the check box at the top and hit Send.

The sent photos will be automatically downloaded to the default AirDroid folder on your computer.
Method 2: Using Live Chat (Send to a Remote Friend)
AirDroid allows users to chat in real-time with connected devices. This is a great option to send a few photos to your friends as well as have a jolly discussion with them.
Follow the below steps to proceed:
Step 1: Install AirDroid Personal on your iPhone and sign in.
Step 2: Open the app and go to the Friends tab. Tap "Add Friend" and enter their email. Hit Confirm.
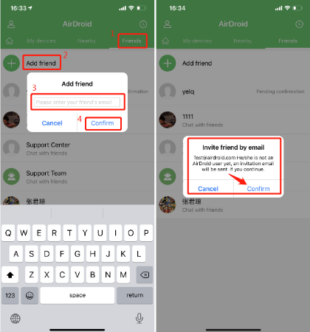
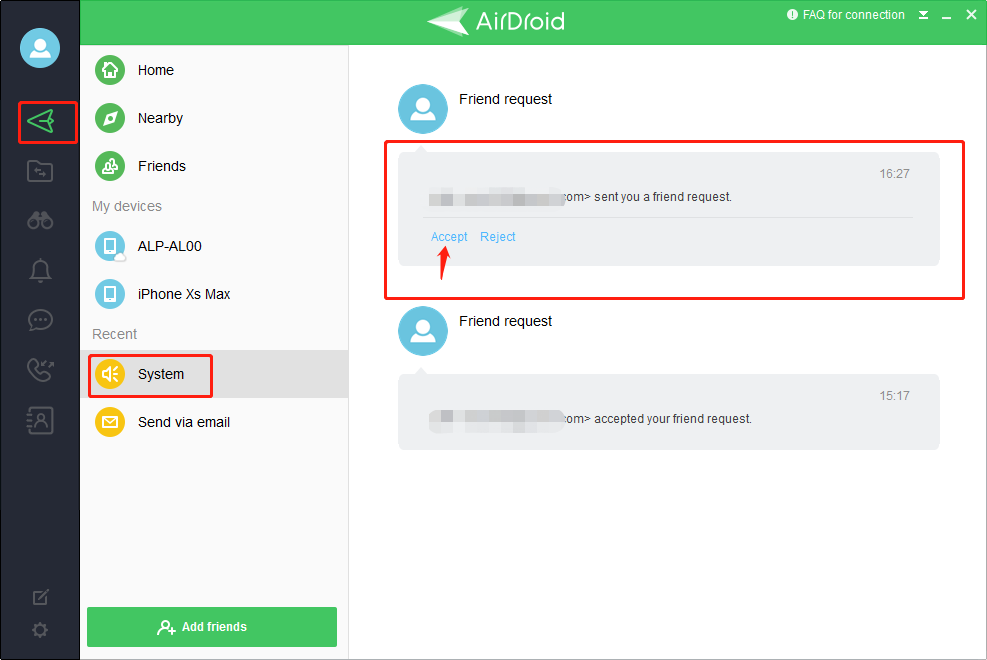
Step 3: Ask your friend to install AirDroid on their computer (or phone) and accept the pending friend request in File Transfer > System.
To accept the friend request on mobile:
Open the AirDroid app and go to tap Friends > Friends request. Tap Accept.
Step 4: Once accepted, you can chat in real-time as well as send them the photos easily.
Method 3: Using AirDroid Web
Want to send photos from iPhone to PC quickly? Consider getting assistance from AirDroid Web. Compatible with all web browsers, it transfers your photos without having to install any tool on the computer.
Here's how to use it:
Step 1: With AirDroid Personal installed on your iPhone, sign in with your account.
Step 2: Under My Devices, tap the AirDroid Web scan icon and scan the code on the AirDroid Web main page.
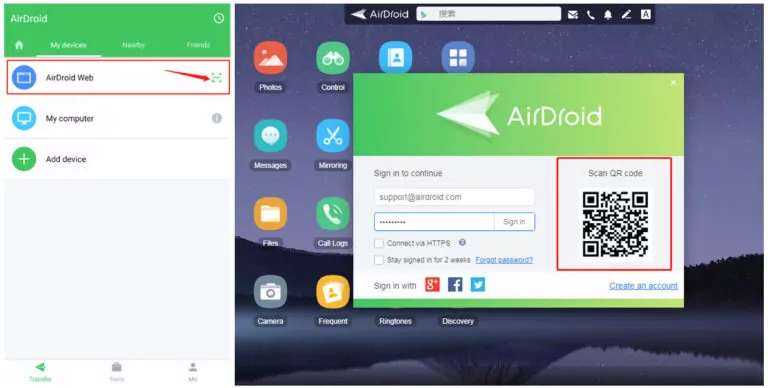
Step 3: After connecting both devices remotely, open the mobile app and select and transfer the photos.
And that's how to send photos from iPhone to computer wirelessly
Other Simple Ways to Transfer Photos from iPhone to Computer
Below are several additional methods to send your iPhone pics to a computer. Take a look!
Method 1: Transfer Photos from iPhone to PC Using iTunes
Editor's Review: Overall, a good method to move photos between the iPhone and computer using a data cable. The procedure is pretty lengthy and tech-savvy and involves using Microsoft's Photos app.
iTunes is an official Apple app to share data between your iPhone and computer for free. Follow the below steps to send iPhone pics to computer using iTunes.
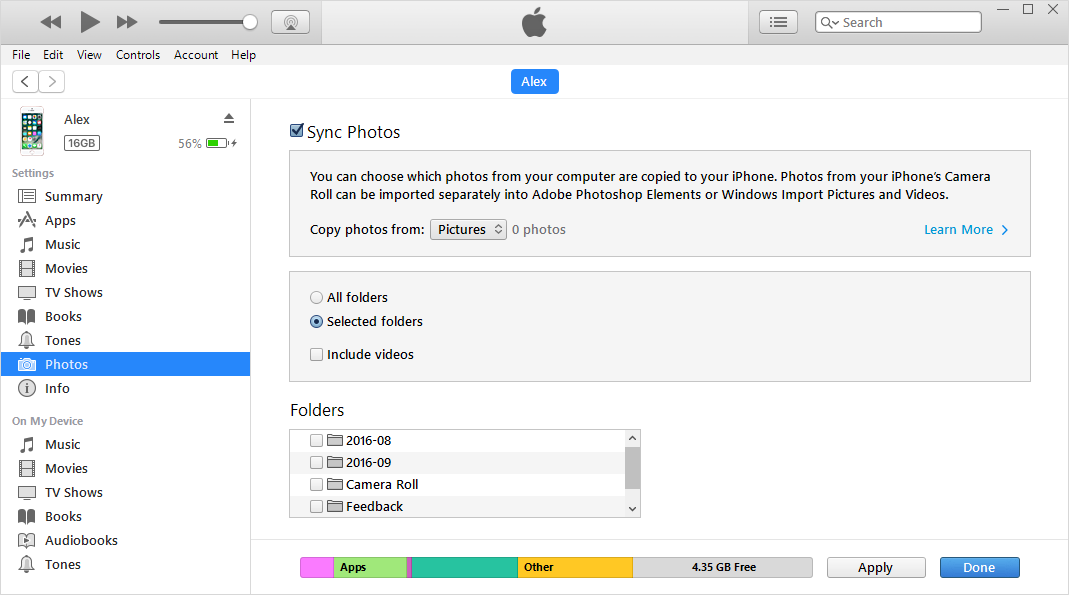
Step 1: Install the latest version of iTunes on your computer or update the existing one.
Step 2: Connect your iPhone to it via a USB cable.
Step 3: When iTunes detects your iPhone, click on the phone icon at the top and select "Photos." Tick "Sync Photos" and select the folders where to sync from.
Step 4: Next, click on the Start icon on your PC and find and run the Photos app. Select "Import > From a USB device".

Step 5: Follow the on-screen instructions to complete the transfer process.
Method 2: Transfer Photos from iPhone to PC Using Google Photos
Editor's Review: A handy solution for moving photos from an iPhone to a computer. But it doesn't support transferring specific files. Instead, it backs up and moves all your iPhone gallery photos.
Google Photos is a cloud backup service that can hold up to 5GB of your photos for free. It offers a two-fold procedure to copy photos from iPhone to PC.
Step 1: Open the Google Photos app, tap your profile picture, and hit "Turn on backup."
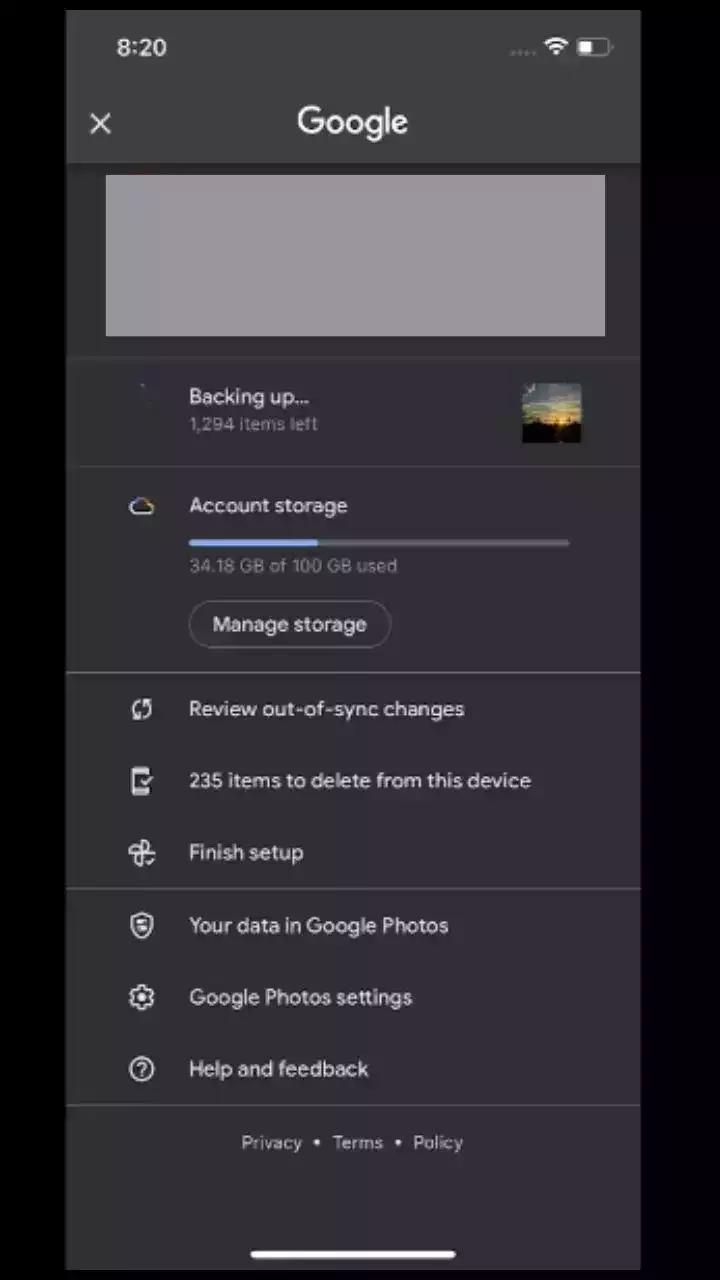
Step 2: Wait until the backup process is finished.
Step 3: Next, log in to Google Photos web and download the photos on your computer.
Method 3: Transfer Photos from iPhone to PC Using iCloud for Windows
Editor's Review: This is a great option to move your iPhone photos wirelessly to a Windows PC. As it involves backing up your iPhone gallery, you might have to wait for some time to complete the process.
Wondering how to transfer photos from iPhone to laptop wirelessly? Try using iCloud for Windows. It synchs your iPhone photos on iCloud where you can easily download them on a Windows PC. However, you cannot move specific iPhone photos as this method makes a copy of all your iCloud photos on the computer.
Here are the steps to send photos to the computer from an iPhone via iCloud for Windows:
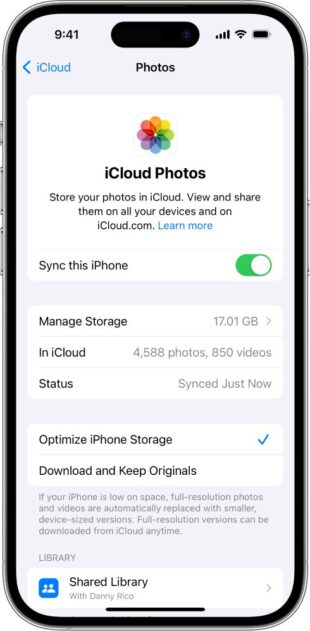
Step 1: On your iPhone, go to Settings > Your Name (at the top) > iCloud > Photos. Toggle on iCloud Photos/Sync this iPhone.
Step 2: Now, download iCloud for Windows on your PC, run it, and log in with your Apple ID.
Step 3: Tick the Photos icon.
Step 4: Then, click on "Options" next to it and tick the options "iCloud Photo Library" and "Download new photos and videos to my PC."
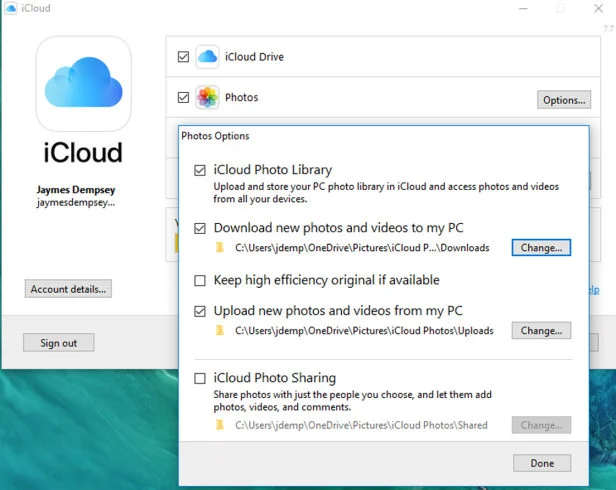
Step 5: Hit Done and Apply. And it will download all your iCloud photos to your PC > iCloud Photos > Downloads.
Method 4: Transfer Photos from iPhone to PC Using iCloud Website
Editor's Review: This solution works for both Windows and Mac computers. But use it if you have enough time at your disposal for moving photos as it also involves backing up your iPhone gallery which is time-consuming.
Don't want to connect your iPhone to a computer using a data cable? No worries as iCloud offers a straightforward procedure for you to upload photos from iPhone to computer wirelessly.
To do that:
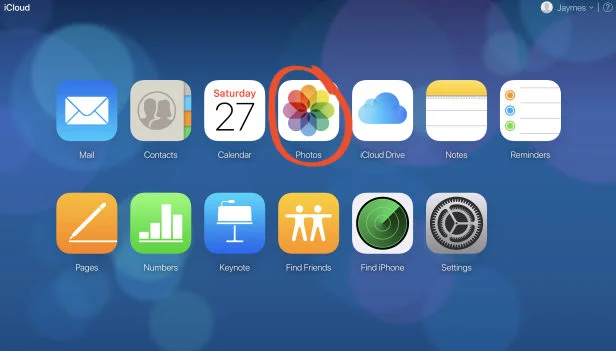
Step 1: Enable iCloud photos on your iPhone in Settings > Your Name > iCloud > Sync this iPhone.
Step 2: Head to iCloud.com on your computer and sign in with your iCloud ID credentials.
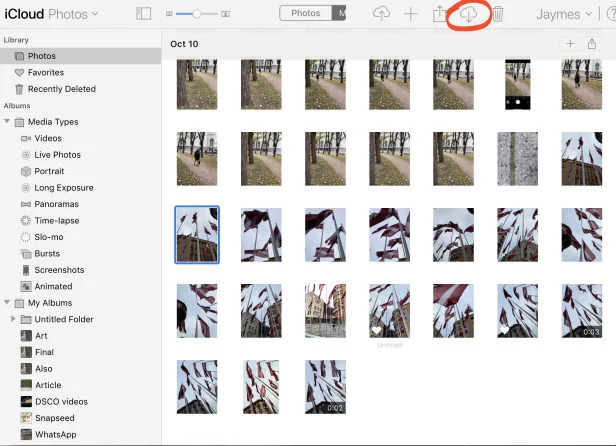
Step 3: Here, click the Photos icon to access your photo library.
Step 4: Select the desired photos and download them to your computer.
Final Remarks
After reading this article, you won't have any trouble in how to send photos from iPhone to a computer with or without iTunes. Each method explained in this guide has its own advantages and downsides. But the most ideal option is using AirDroid Personal to share photos between your iPhone and PC.
With its friendly interface, high transfer speed, and wireless connection, transferring iPhone photos across different platforms is easier than ever. Download it for free and try its spectacular mobile management features.
FAQs
1. What is the easiest way to transfer photos from iPhone to computer?
AirDroid Personal offers the easiest way to move photos from iPhone to PC. It works seamlessly with all iPhone models, including iPhone 15, and supports easy integration with any other device.
2. Why won't my iPhone photos import to my computer?
Mostly, the issue occurs because of compatibility problems between an iPhone and a Windows PC. Or the USB cable you're using to connect the devices is damaged or malfunctioning. Also, the USB drivers for data transfer on your computer might be outdated.
3. How do I transfer photos from iPhone to computer without iTunes?
Use AirDroid Personal to transfer photos from iPhone to PC without iTunes. Unlike iTunes, it supports wireless data transfer at a super-fast speed.


Leave a Reply.