How to use QR Code Enrollment in MDM
1 What is QR Code in MDM and its functions?
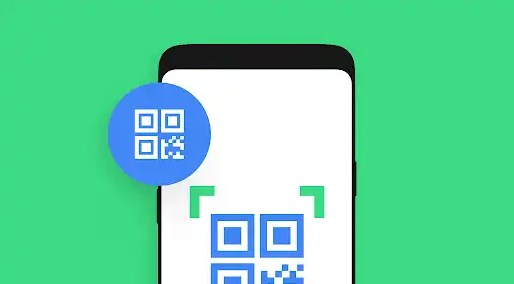
Quick response (QR) code is a fast and a straight-forward way of bulk enrolling Android devices into a mobile device management (MDM) server.
While various device enrollment methods (like ZTE, NFC, ABM, and KME) are offered by MDM solutions, QR code enrollment serves as a valuable solution for the devices that aren’t supported by any of these methods.
Moreover, it exhibits a higher degree of seamlessness in comparison to the other enrollment methods, thanks to the feature of creating provisioning templates in advance. These templates comprise all the essential settings, configurations, and policies tailored to the specific intended use of (an individual or a group) of devices.
Source: www.android.com/enterprise/enrollment/
How Android QR code enrollment works?
The process begins with creating provisioning templates and generating unique QR codes for each template through the dashboard of your MDM solution.
Here are the 2 key functions that QR-enrollment performs:
- 1) Enrolls the device and auto-configure settings: The IT admin distributes the generated QR code among all the end-users (typically employees). Since the QR code contains all essential enrollment credentials, a simple scan of the code by an employee gets his device automatically enrolled into the organization’s management system.
Once enrolled, the devices are automatically configured according to the settings and policies specified in the enrollment template. - 2) Group-deploy the devices: Because the provisioning template also holds the information about users, groups, and naming conventions for devices, multiple devices can be deployed at once with minimal admin intervention.
2 Requirements of using QR code for device enrollment
The device must be:
- Operating on Android 7.0 or a later version.
- Either new or reset to its factory settings.
- Google certified. (Tip: to verify this, follow the steps: Google Play Store > Settings > Play Protection Certification. Here you’ll find the certification status of your device.)
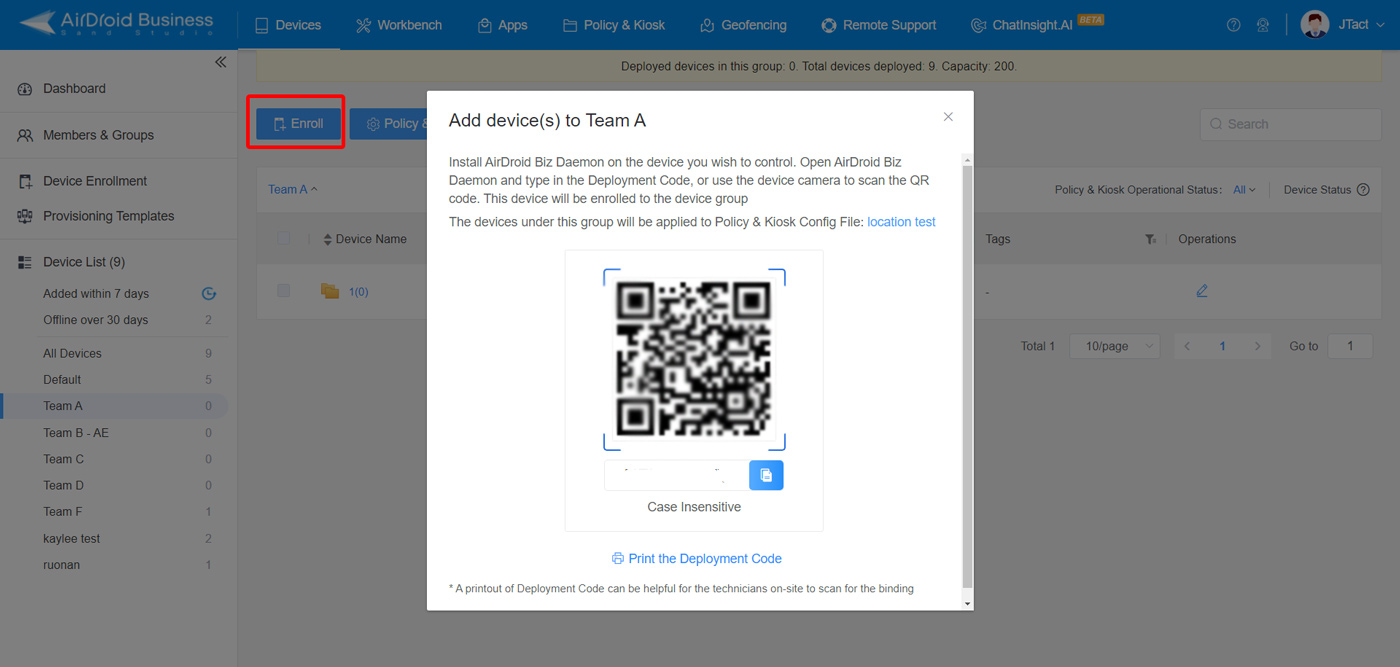
3 Where can you find the QR code?
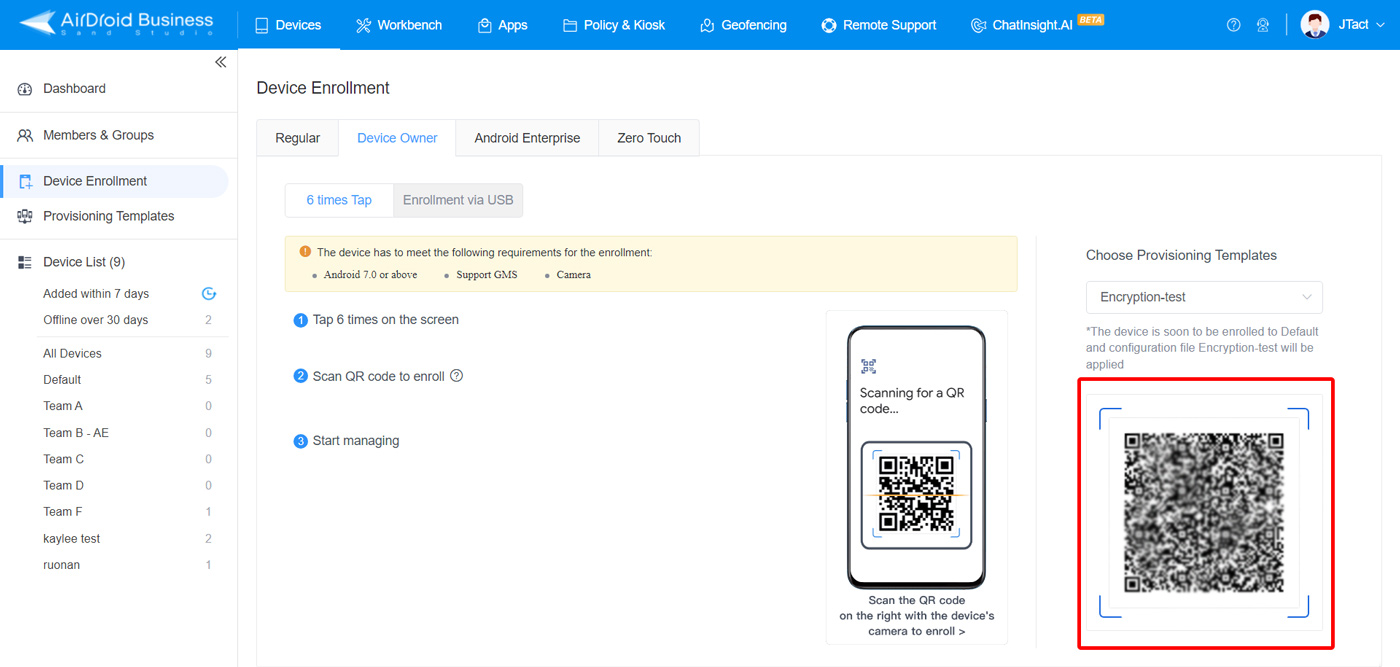
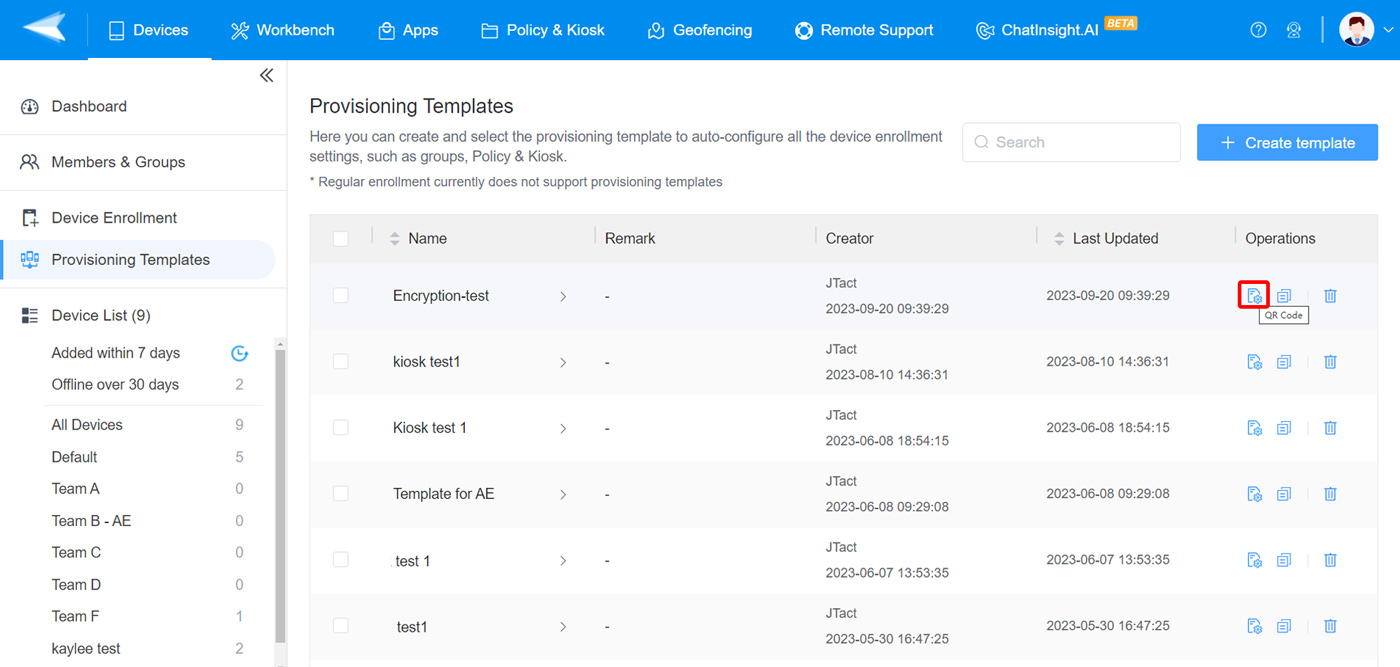
The Android enrollment QR code is placed in the admin console of your MDM software. But the specific position will be different based on the MDM you used. In AirDroid Business, you can find it in:
- Device > Device Enrollment > Device OWner / Android Enterprise;
- Device > Provisioning Templates > Operations > QR code
- Device > Device List > Default / a certain device group


4 How to use QR code enrollment?
Let's start Android Enterprise QR code enrollment with AirDroid Business.
1 Create provisioning templates.
Start off with creating a provisioning template – a blueprint for the policies and configurations to be assigned to devices. The template will define how the QR-enrolled devices will be configured. You can consider this step as Android QR code setup and with configuration settings in the code. To create the template, follow the steps below.
a. Login to the Admin console of AirDroid.
b. Navigate to Devices > Provisioning Templates.
c. Click Default Configuration (for using default template); or Click +Create Template (for creating a new template).

2 Select one or more options to complete the provisioning template settings
While configuring the template, there are setting options related to device group, policy/kiosk config file, pre-install apps, and others like default language, time zone, and network.
You must choose one of the first two options to complete the configuration, and you can skip the rest.
- (Required) Option 1: Select Device Group - Deploy devices to the choosen group once they are enrolled.
- (Required) Option 2: Select Config File - Deploy devices if you have specific setting rules. You will need to pre-configure a policy or kiosk file first so that you can select them in the blank.
- Option 3: Pre-installed apps - If your organization relies on specific apps, you can choose them to automatically install during the process of template creation.
- Option 4: Other settings - You can further customize your template through additional settings here.
3 Register/Bind your Gmail with AirDroid Business
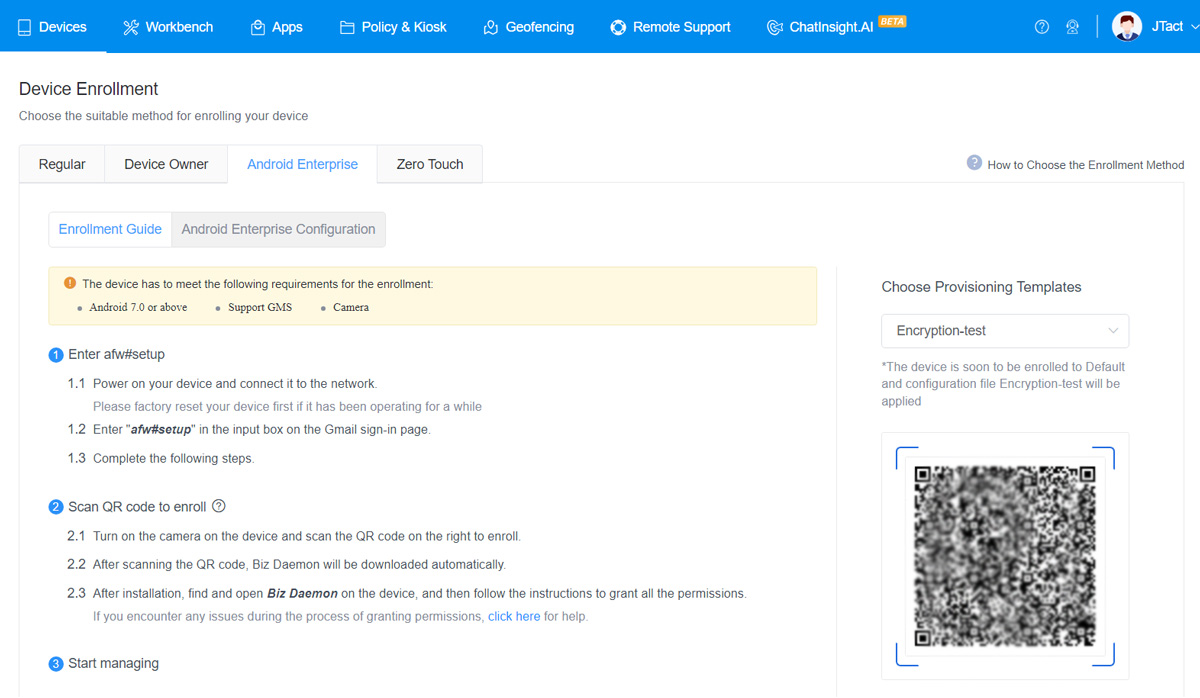
Go to 'Device' > 'Device Enrollment' > 'Android Enterprise.'
Click the button and you will jump out and to a page that will require you to fill in company information. As you finish, you will be back to AirDroid Business.
Now, you can see 'Enrollment Guide' and 'Android Enterprise Configuration' being activated.
4 Power on a new Android device or factory reset
As you turn on the phone or tablet, connect to the network.
The Google Signin page will prompt later. In the page, you need to enter 'afw#setup' instead of your Gmail. You can ask your employee to complete this step.

5Choose the template and scan the mdm QR code.
In the 'Enrollment Guide' dashboard, you can see 'Choose Provisioning Templates' in the right side. Drop down the menu and choose your completed template. An Android enrollment QR code of it will display under it.
Now pick up your phone and scan the QR code. Biz Daemon (the supporting app for controlled end device) will be downloaded automatically. And the enrollment process is done.
5Benefits of using QR code enrollment
- Minimizes manual errors, saves time, and reduces the administrative efforts by creating provisioning templates.
- Simplifies the bulk enrollment process by automatically assigning devices to the tagged users and device groups.
- Automates policy and configuration assignment to devices through provisioning templates, ensuring compliance with organizational policies.
- Supports naming patterns to be associated with devices, making them easy to identify and enroll.
- Enables multiple devices to be assigned to a single user, simplifying device management.
- Is specifically useful for provisioning non-NFC devices.
Leave a Reply.